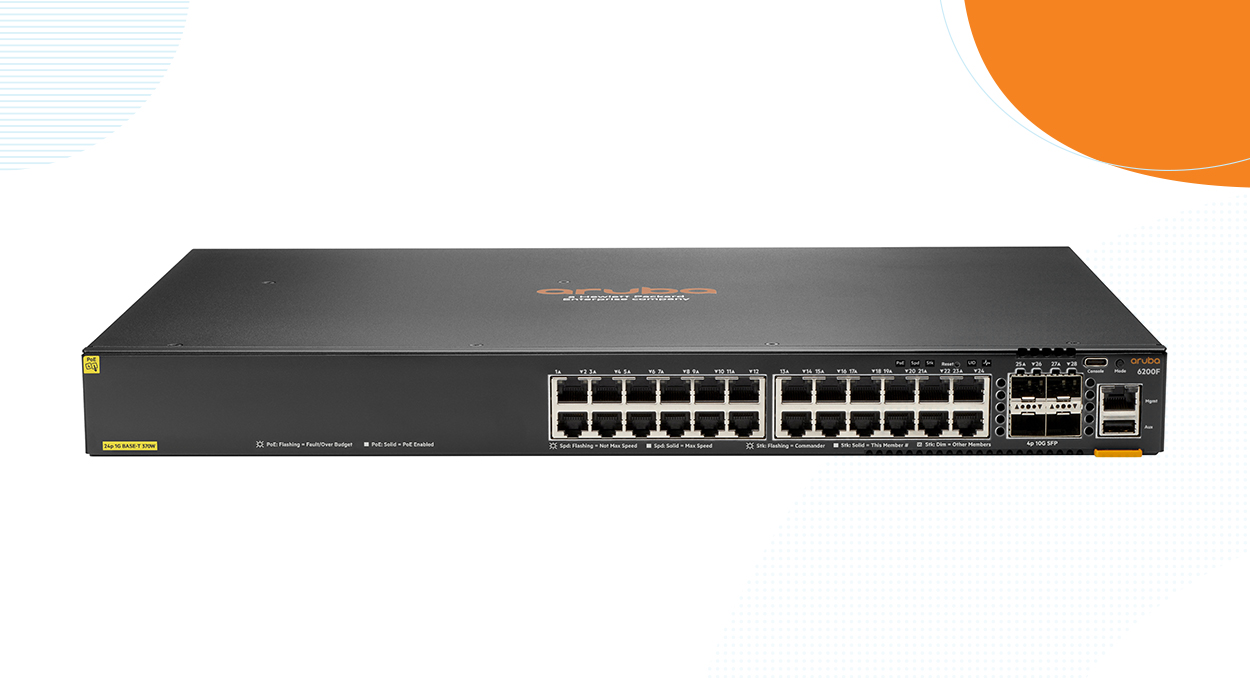
The Aruba CX 6300 Switch Series is a modern, flexible and intelligent family of stackable switches released in 2020. It is ideal for enterprise network access, aggregation, core and data center top of rack (ToR) deployments.
In this post, we’ll show you how you can get started with the CX 6300 initial switch configuration using the CX Mobile App.
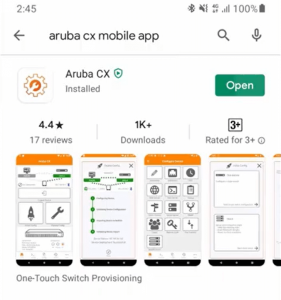
The Aruba CX Mobile App is an easy-to-use mobile app that simplifies connecting, stacking and managing Aruba CX 6300 switches for any size project.
Watch the CX 6300 Unboxing and Quick Start Guide below or scroll further for the step-by-step walkthrough.
Getting Started with the CX 6300 Switch Config
-
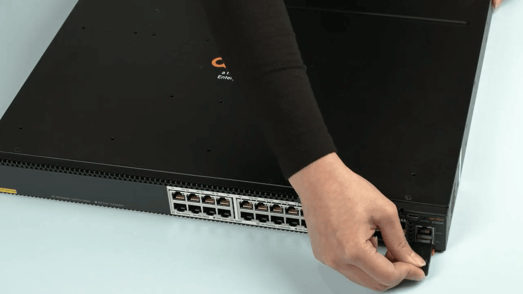
Insert the USB Bluetooth dongle into the Auxiliary USB port and power up your switch.
-
While waiting for the switch to boot up, go to your Google Play or Apple App Store and download and install Aruba CX Mobile app.

-
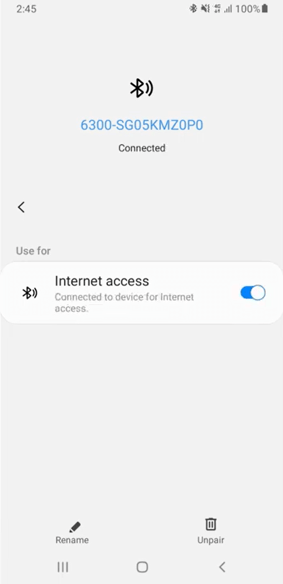
Enable Bluetooth and pair your mobile device with the Switch Bluetooth adapter. The name will be in the format: switch model-switch serial number
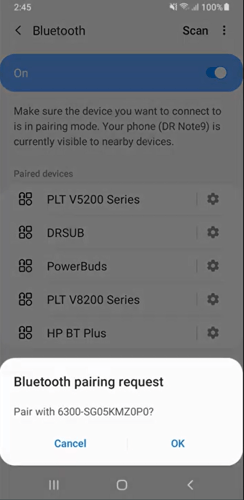
On some devices, you will have to enable Internet access through the Bluetooth.
-
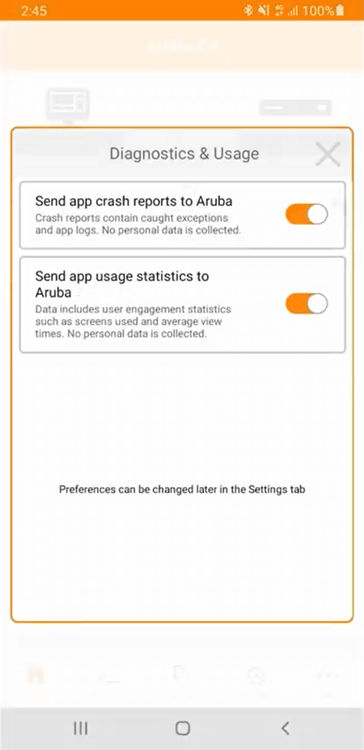
Now, open the Aruba CX mobile app.
-
Close Diagnostics and Usage preferences.
-
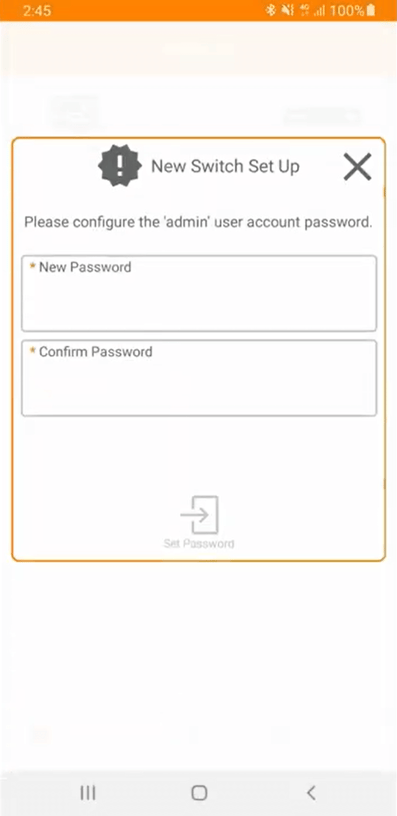
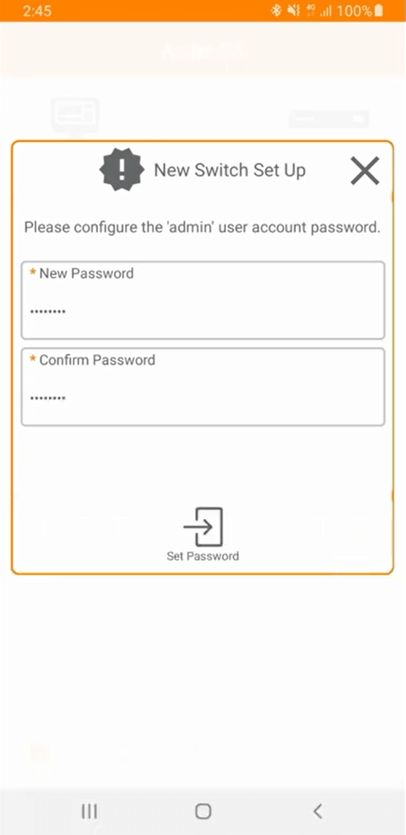
As soon as your switch has been detected, the app will prompt you to set the admin user account password
-
Type in your password twice and click on Set Password
-
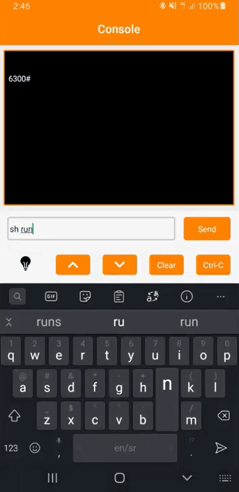
Once you are connected, you can directly access the CLI through the app by tapping on Console at the bottom.
-
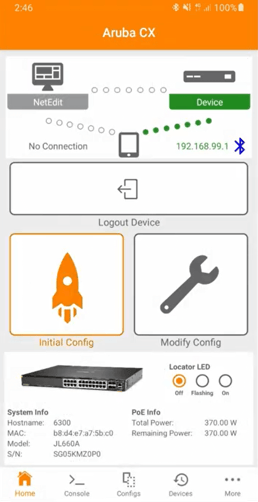
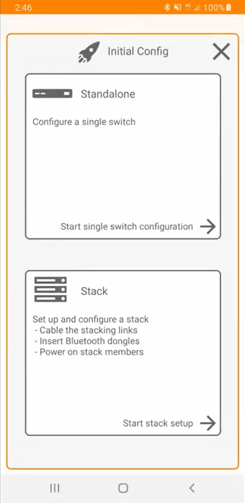
In this example, we’ll run the initial config through the wizard. We’ll start the single switch configuration by tapping on Initial Config, then Start single switch configuration
-
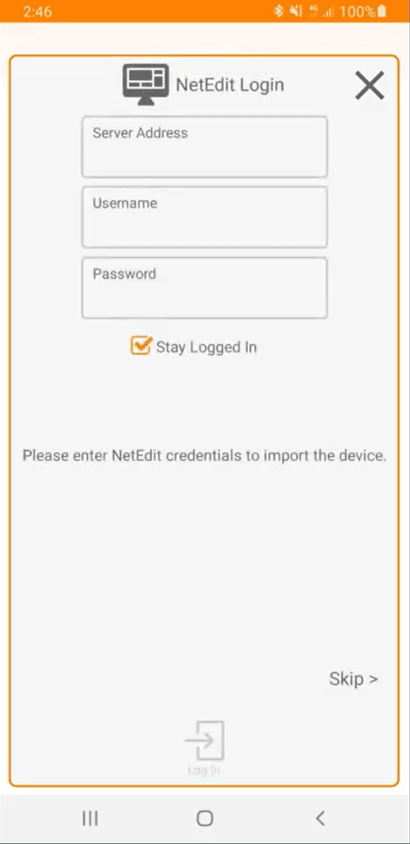
Skip netEdit details
-
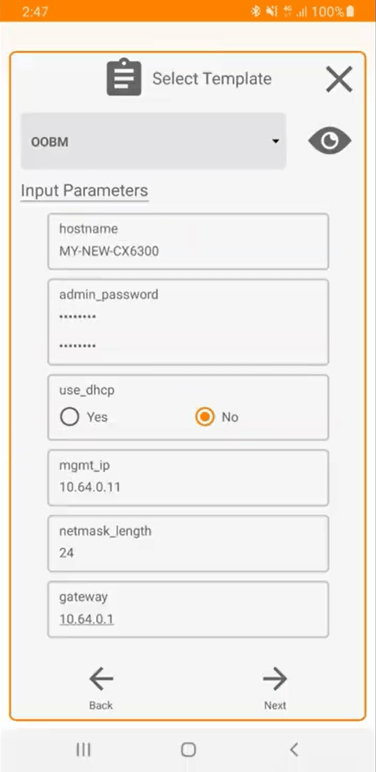
Configure hostname/admin password and static IP address on the out of band management interface.
-
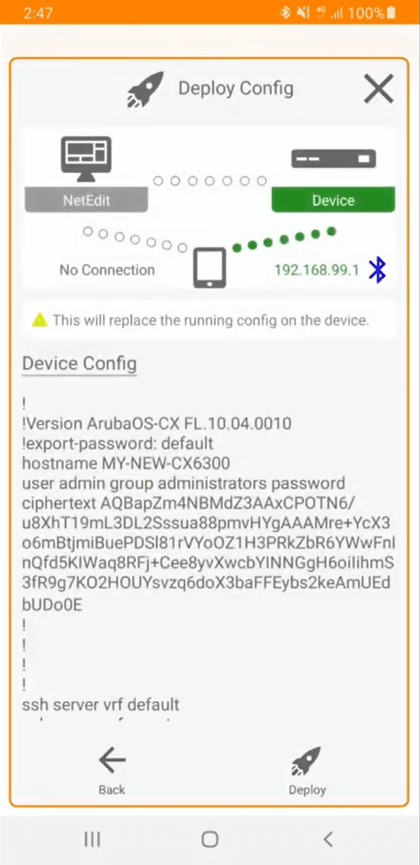
Aruba CX Mobile App will generate a copy of the new config which is ready for deployment. Review it and click on Deploy.
-
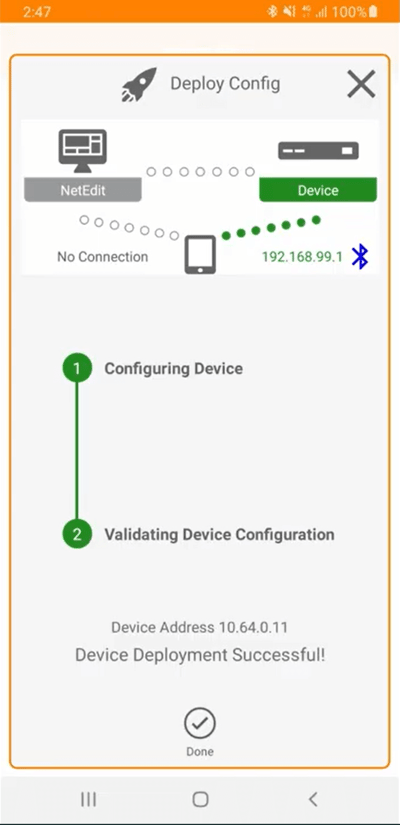
After the config has been deployed and verified, click on Done.
-
Now let’s connect the switch Out of Band Management port to our network.
-
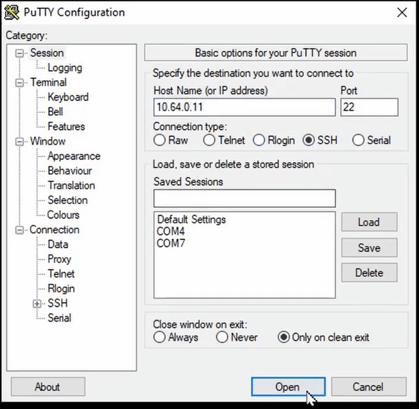
Try accessing the switch using SSH.

-
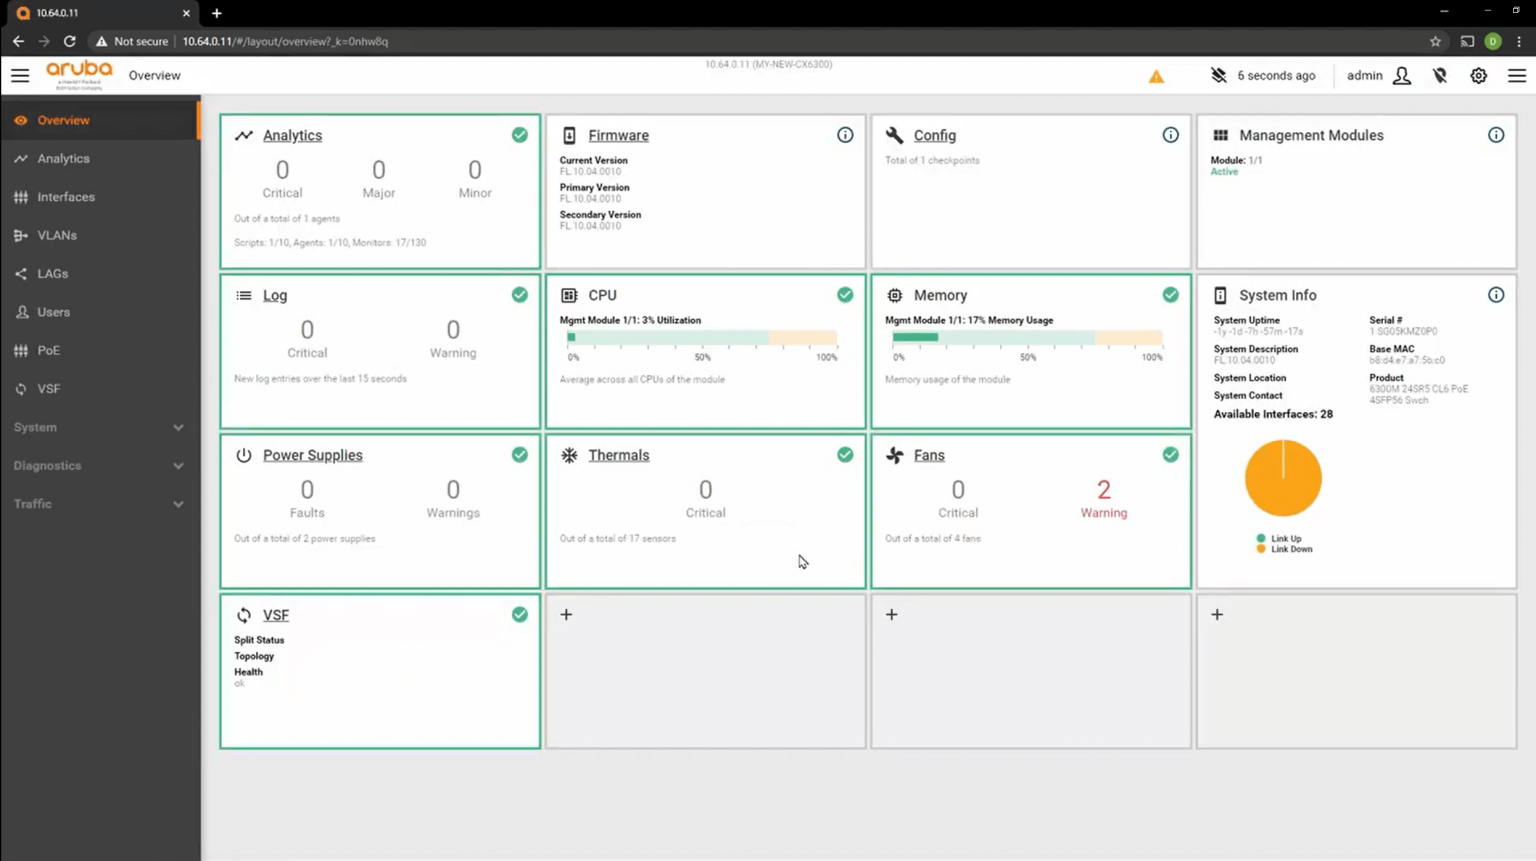
Now try accessing it using a web browser.

What the 'Five Eyes' Cybersecurity Guidance Means for Cyber Resilience

HPE Resource Services: Helping Partners Accelerate IT Projects, Reduce Risk and Deliver More Value

Same Old Story, Just Faster - Why Australian businesses keep falling for the same cyber threats

How to Add Devices to Aruba Central

How to Remove Devices from Aruba Central